
Last Saturday, I came up with the idea to build an edge inference system to observe trick-or-treaters at my front door, identify their costumes, and stream the results to a fun website. What followed was a six day sprint to bring this idea to life, filled with a lot of late nights, fun learnings, and stares from neighbors. This is a quick technical write up on how I built it, what edge cases I encountered, and what I learned along the way.
@alanaagoyal · october 31, 2025
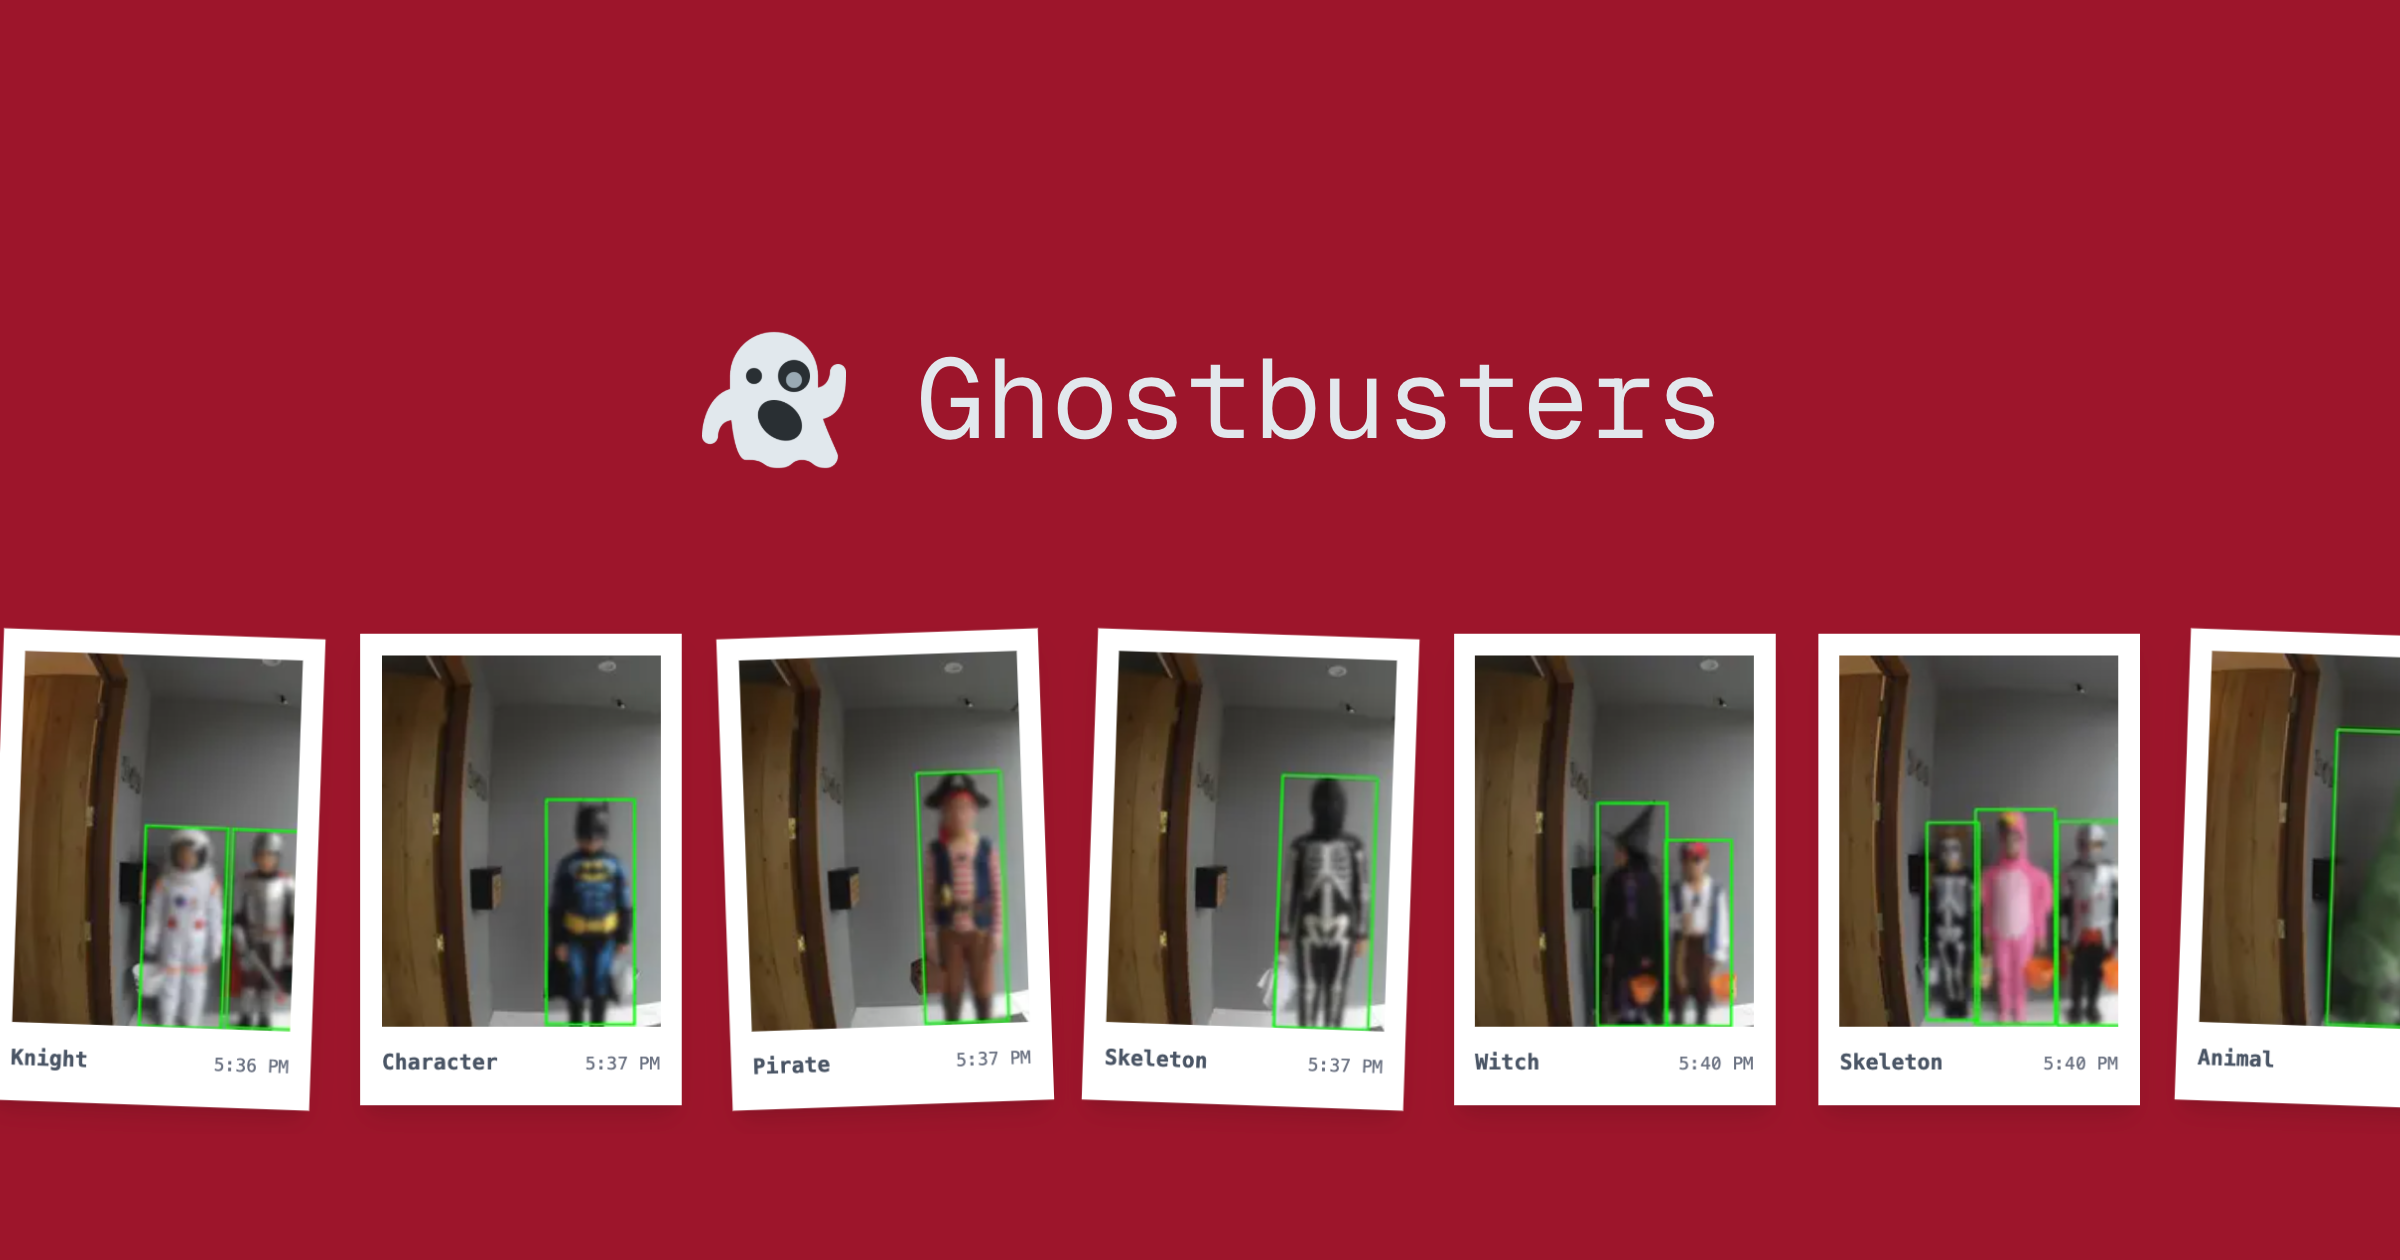
i hooked my doorbell feed up to a raspberry pi that runs some vision models to detect & classify trick-or-treaters in real time happy halloween 👻
Implementation
The system is built around a simple data flow: video comes in, people get detected, costumes are classified, and results are streamed to a dashboard in real time. The architecture is split between edge compute (person detection and annotating) and cloud services (costume classification and storage).
The system has four main components:
- Edge detection: A Raspberry Pi 5 processes the DoorBird's RTSP video stream and uses YOLOv8 to detect and annotate people
- Costume classification: Detected frames get sent to Baseten's API, which runs a vision-language model (Gemma 3 27B) to identify and describe costumes
- Data persistence: Supabase stores the images (blurred for privacy) and detection metadata
- Live dashboard: A Next.js web app subscribes to Supabase's real-time updates and displays new trick-or-treaters as they arrive
DoorBird (RTSP stream)
  → Raspberry Pi 5 (YOLO person detection)
  → Baseten API (Gemma 3 27B costume classification)
  → Supabase (storage + database + realtime)
  → Next.js dashboard (live updates via realtime)
The sections below walk through each of these components in detail.
Edge detection
My DoorBird doorbell has a built-in RTSP server that streams video on the local network. With the IP address and admin credentials from the user manual, I connected to the stream:
import cv2
import os

doorbird_ip = os.getenv("DOORBIRD_IP")
username = os.getenv("DOORBIRD_USERNAME")
password = os.getenv("DOORBIRD_PASSWORD")

rtsp_url = f"rtsp://{username}:{password}@{doorbird_ip}/mpeg/media.amp"
cap = cv2.VideoCapture(rtsp_url)

ret, frame = cap.read()
if ret:
    print(f"✅ Connected! Frame shape: {frame.shape}")  # (720, 1280, 3)
The stream runs at 30fps and provides 1280x720 RGB frames.
With the video stream ready to go, I turned my attention to the Raspberry Pi. I assembled the Raspberry Pi (spending an embarrassing amount of time trying to get the microSD card into the USB Reader) and flashed the operating system using the Raspberry Pi Imager. I wanted to be able to run everything from my laptop, so I pre-configured WiFi and SSH.
After booting up, I SSH'd in and installed the dependencies:
# System packages for video processing
sudo apt update && sudo apt upgrade -y
sudo apt install -y python3-opencv gstreamer1.0-plugins-good \
    gstreamer1.0-plugins-bad gstreamer1.0-plugins-ugly \
    gstreamer1.0-libav ffmpeg

# Modern Python tooling with uv (blazing fast package manager)
curl -LsSf https://astral.sh/uv/install.sh | sh
source $HOME/.local/bin/env
I used uv, a Rust-based Python package manager, for dependency management. On a resource-constrained Raspberry Pi, dependency installation speed matters, and uv's ability to resolve and install packages in parallel made things run smoothly.
I cloned my repo and set up the environment:
git clone https://github.com/alanagoyal/ghostbusters.git
cd ghostbusters
uv sync  # Creates venv and installs dependencies in ~2 minutes
The next step was to start detecting people. To do this, I used YOLOv8n, the newest YOLO model, which can be used for object detection, image classification, and instance segmentation tasks. It's a 6MB model that's fast enough to run on a Raspberry Pi CPU, while still being accurate.
uv add ultralytics
from ultralytics import YOLO

model = YOLO("yolov8n.pt")  # Downloads model on first run (~6MB)

frame_count = 0
while cap.isOpened():
    ret, frame = cap.read()
    if not ret:
        break

    frame_count += 1

    # Process every 30th frame (~1 fps)
    if frame_count % 30 != 0:
        continue

    # Run YOLO inference
    results = model(frame, conf=0.5)

    # Check for people (class 0 in COCO dataset)
    for box in results[0].boxes:
        if int(box.cls[0]) == 0:  # Person class
            confidence = float(box.conf[0])
            x1, y1, x2, y2 = box.xyxy[0].cpu().numpy()

            # Crop person from frame
            person_crop = frame[int(y1):int(y2), int(x1):int(x2)]
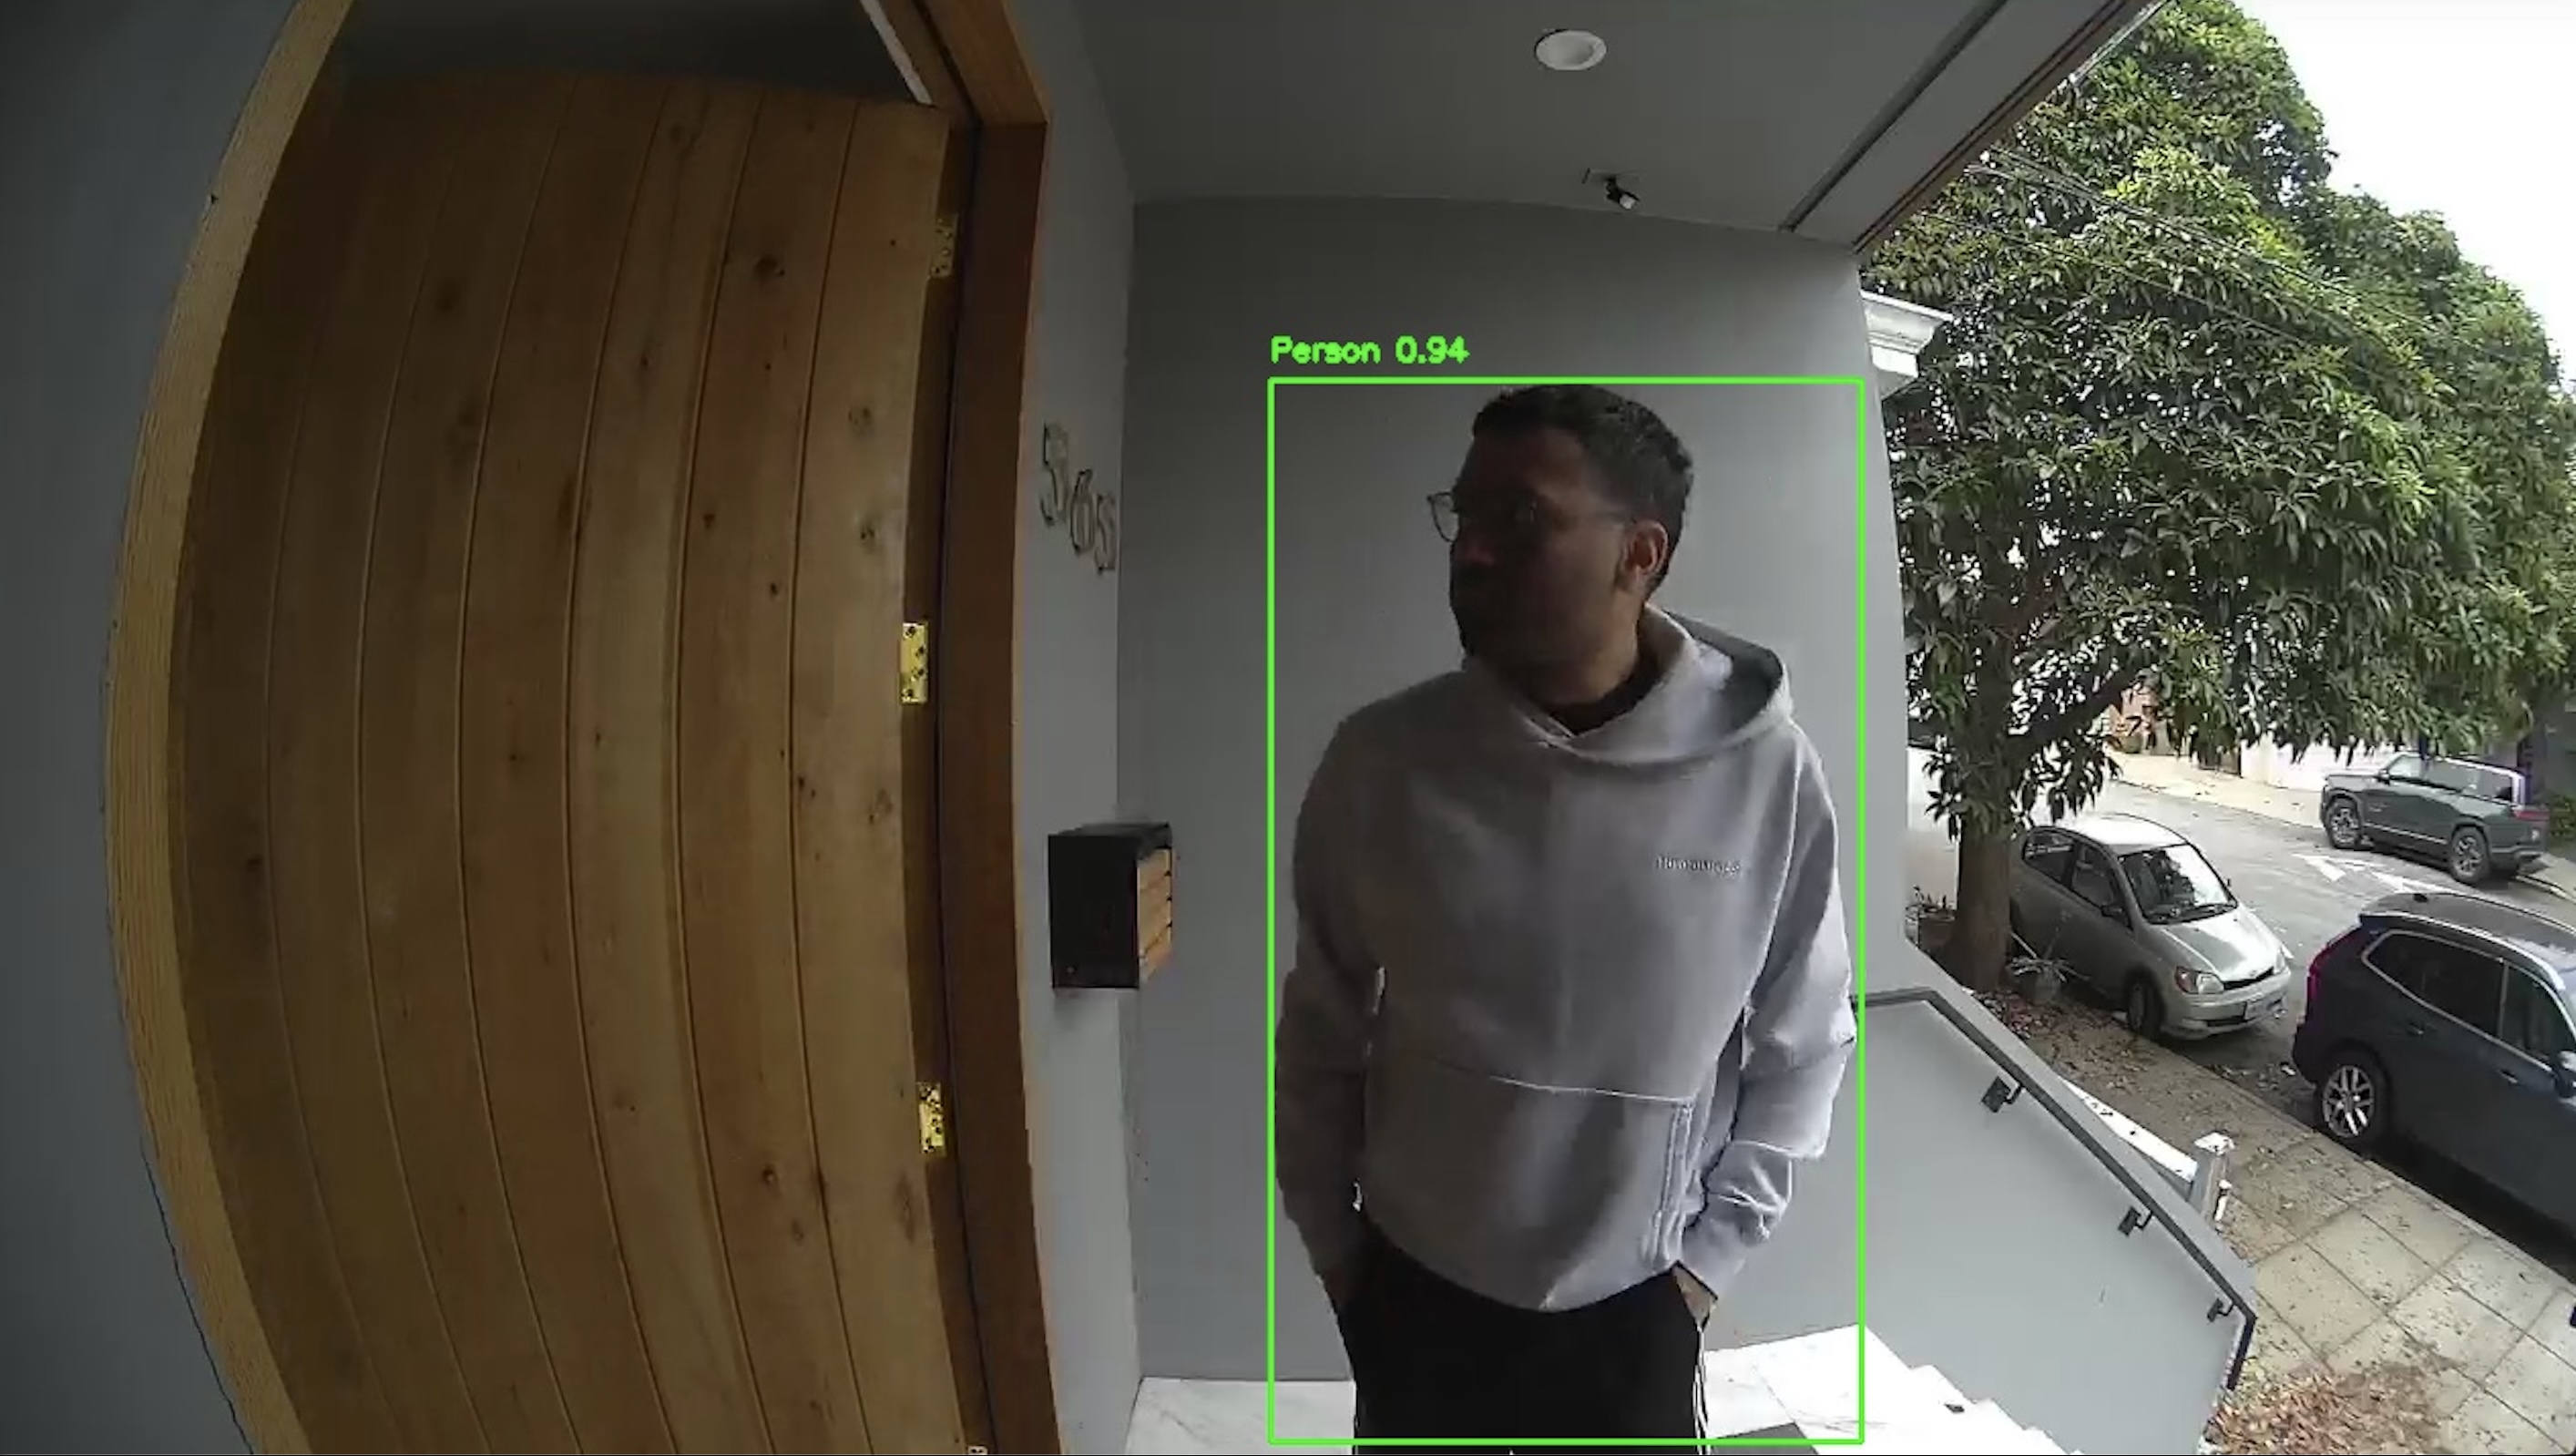
The initial implementation was very basic: process every 30th frame from the video stream (about 1 fps), check for people (class 0 in COCO dataset), draw a bounding box around them, and save the image locally. To test it, I SSH'd into the Raspberry Pi, ran the script, and asked my husband to go stand outside. It worked!
Costume classification
Next, I needed to find a vision model to describe and classify costumes. I chose Gemma 3 27B IT from Baseten's Model Library.
The prompt instructs the model to return a short description, classification (from a fixed set of options), and a confidence score.
# Encode image to base64
img_base64 = base64.b64encode(image_bytes).decode("utf-8")
data_uri = f"data:image/jpeg;base64,{img_base64}"

# Default prompt optimized for Halloween costume classification
prompt = custom_prompt or (
    "Analyze this Halloween costume and respond with ONLY a JSON object in this exact format:\n"
    '{"classification": "costume type", "confidence": 0.95, "description": "costume description"}\n\n'
    "Preferred categories:\n"
    "- witch, vampire, zombie, skeleton, ghost\n"
    "- superhero, princess, pirate, ninja, clown, monster\n"
    "- character (for recognizable characters like Spiderman, Elsa, Mickey Mouse)\n"
    "- animal (for animal costumes like tiger, cat, dinosaur)\n"
    "- person (if no costume visible)\n"
    "- classic monsters: mummy, frankenstein, werewolf, grim reaper, demon, devil\n"
    "- fantasy/mythical: fairy, mermaid, wizard, dragon, elf, sorcerer/sorceress\n"
    "- historical/warrior: knight, viking, samurai, gladiator, pharaoh, greek god/goddess\n"
    "- occupations: doctor, nurse, police officer, firefighter, chef, detective, astronaut, ghostbuster\n"
    "- western/sport/dance: cowboy, cowgirl, ballerina, cheerleader, athlete\n"
    "- sci-fi/other: alien, robot, dinosaur, pumpkin, scarecrow, jester, mime, hippie, rocker, steampunk, royalty, pirate wench\n\n"
    "- other (if costume doesn't fit above categories)\n"
    "Rules:\n"
    "- classification: Use one of the preferred categories above\n"
    "- description: A short description focused on the costume itself (e.g., 'An astronaut with a space helmet', 'A pop-star holding a microphone', 'A witch with a pointed hat'). Describe the costume elements directly, not the person or their clothing. If no costume is visible, use 'No costume'.\n"
    "- confidence: Your confidence score between 0.0 and 1.0\n"
    "- Output ONLY the JSON object, nothing else"
)
Baseten has an OpenAI-compatible API, so the code is very straightforward:
import base64
import requests

class BasetenClient:
    def classify_costume(self, image_bytes: bytes):
        # Encode image to base64
        image_b64 = base64.b64encode(image_bytes).decode("utf-8")

        response = requests.post(
            self.model_url,
            headers={"Authorization": f"Api-Key {self.api_key}"},
            json={
                "messages": [
                    {
                        "role": "user",
                        "content": [
                            {"type": "text", "text": prompt},
                            {"type": "image_url", "image_url": {"url": f"data:image/jpeg;base64,{image_b64}"}}
                        ]
                    }
                ],
                "max_tokens": 200,
            }
        )

        result = response.json()["choices"][0]["message"]["content"]
        return result
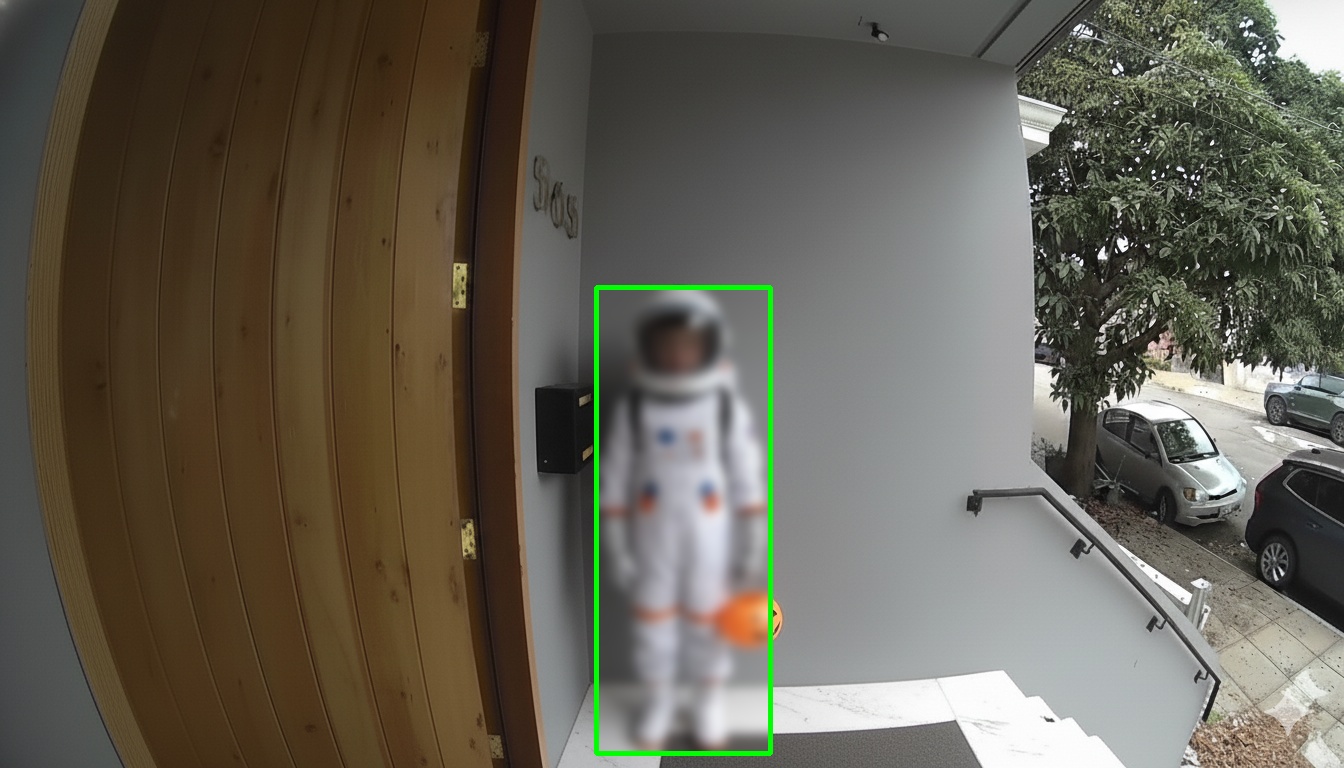
Knowing I wanted to put the photos on the website, I had to think about security and privacy. I
first considered doing basic face detection, but instead decided to blur everything within the
bounding box, which seemed like a safer option
(backend/scripts/main.py:340). The system applies a Gaussian blur
with a kernel size of 33 to each person's bounding box region. Importantly, I run the vision model
on the unblurred image first, then blur before storing them.
Data persistence
I also needed a database and file storage for the detection data and images. Naturally, I chose Supabase. I created a table for the detection data and a storage bucket for the images:
create table person_detections (
  id uuid primary key default gen_random_uuid(),
  timestamp timestamptz not null,
  confidence float4 not null,
  bounding_box jsonb not null,
  image_url text,
  device_id text not null,
  costume_classification text,
  costume_confidence float4,
  costume_description text,
  created_at timestamptz default now()
);

-- Create storage bucket for images
insert into storage.buckets (id, name, public)
values ('detections', 'detections', true);

-- Enable realtime updates
alter publication supabase_realtime add table person_detections;
I also used Supabase's Python library to create a client that handles uploads.
Live dashboard
Tying it all together, I built a simple Next.js website to display the live feed of trick-or-treaters and some interesting analytics about their costumes. Whenever a new person is detected, the dashboard updates instantly using Supabase's real-time subscriptions:
useEffect(() => {
  // Fetch initial data
  async function fetchDetections() {
    const { data } = await supabase
      .from("person_detections")
      .select("*")
      .order("timestamp", { ascending: false })
      .limit(50);

    setDetections(data || []);
  }
  fetchDetections();

  // Subscribe to real-time updates
  const channel = supabase
    .channel("person_detections")
    .on(
      "postgres_changes",
      { event: "INSERT", schema: "public", table: "person_detections" },
      (payload) => {
        setDetections((prev) => [payload.new, ...prev]);
      },
    )
    .subscribe();

  return () => {
    supabase.removeChannel(channel);
  };
}, []);
I also added some fun animations to draw attention to new detections.
Testing
In order to test this project, I had to get a little creative. Since I wouldn't have kids in costumes on my doorstep until Halloween, I used Google AI Studio to generate some images for me. I then created a test script to run the model on those images.
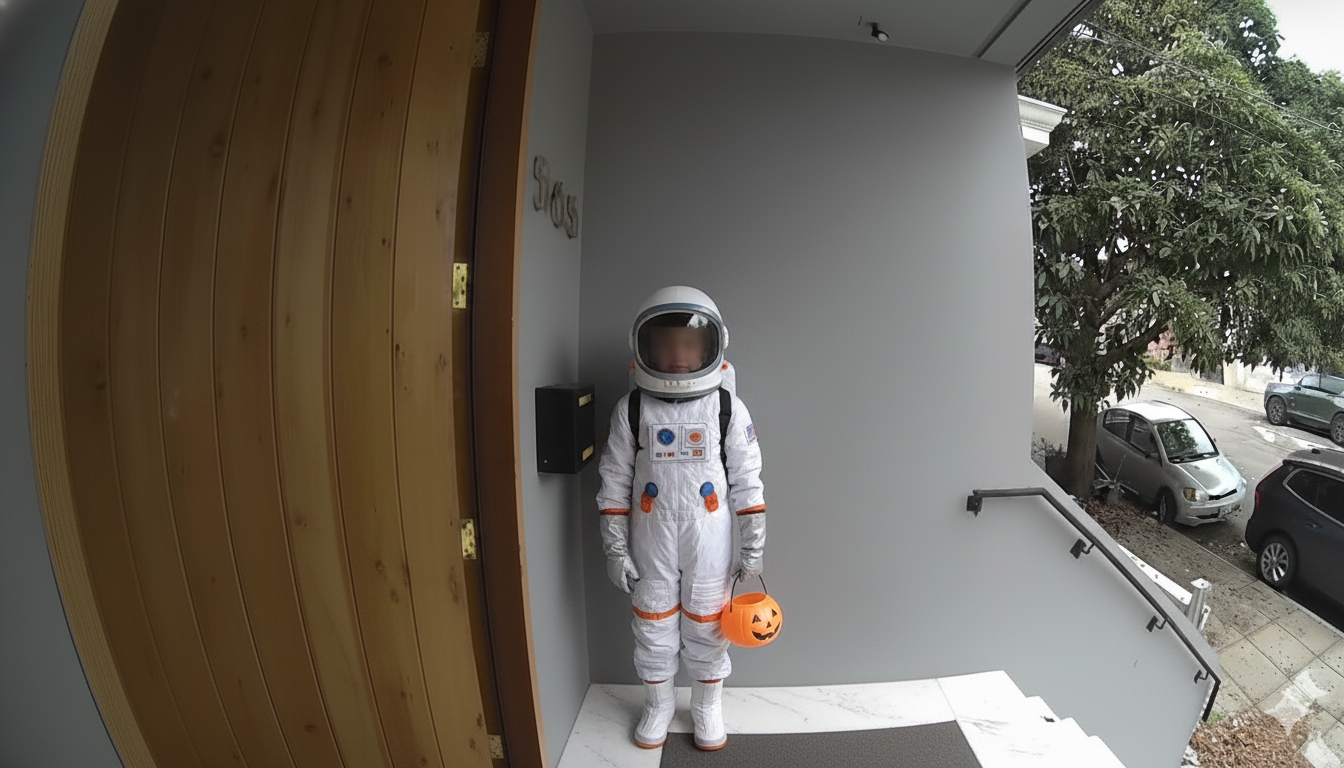
alanaanderson@Alanas-MacBook-Air ghostbusters % uv run backend/tests/integration/tes
t_costume_detection.py
🎃 Halloween Costume Detection Test
======================================================================

This script will:
1. Load test images from backend/tests/fixtures/
2. Classify costumes using Baseten API
3. Upload results to Supabase database
4. Save annotated images to backend/tests/test_detections/

🔧 Initializing clients...
✅ Baseten connected (Model: gemma)
✅ Supabase connected (Device: halloween-pi)

🤖 Loading YOLOv8n model...
✅ Model loaded!

📸 Found 1 test images

======================================================================
Processing: test.png
======================================================================
📐 Image dimensions: 1344x768
🔍 Running YOLO dual-pass detection...
✅ PASS 1: Detected 1 standard person(s)
🎈 PASS 2: Found 3 potential inflatable(s)
   Validating 3 potential inflatable costume(s)...
   ❌ Rejected car (not a costume)
   ❌ Rejected car (not a costume)
   ❌ Rejected car (not a costume)
📦 Using detection: {'x1': 596, 'y1': 287, 'x2': 770, 'y2': 753}

🎭 Classifying costume with Baseten...
✅ Classification successful!
   Type:        occupations
   Confidence:  0.98
   Description: A white astronaut suit with a helmet, backpack, and orange gloves and boots.
🔒 Blurred person for privacy

💾 Saved detection locally: backend/tests/test_detections/test.jpg

📤 Uploading to Supabase...
✅ Detection saved to Supabase (ID: <supabase_id>)
   Image URL: <supabase_url>
✅ Successfully uploaded to Supabase!

======================================================================
📊 SUMMARY
======================================================================

Total images processed: 1
Successful classifications: 1
Uploaded to Supabase: 1

🎭 Detected Costumes:
----------------------------------------------------------------------

  test.png
    Classification: occupations
    Confidence:     0.98
    Description:    A white astronaut suit with a helmet, backpack, and orange gloves and boots.
    Uploaded:       ✅

======================================================================
✨ Test complete!

📁 Check backend/tests/test_detections/ for annotated images
🌐 Check your Supabase dashboard for uploaded detections
📊 Check your Next.js dashboard for real-time display
======================================================================
Production hardening
After testing the end-to-end flow for a few minutes, I realized that there's a big difference between a working prototype and something that can run unsupervised for 4 hours on Halloween night. To solve for this, I added graceful degradation everywhere with try-catch blocks that handle stream disconnections by automatically reconnecting after a 5-second delay. The detection loop continues even if individual frame processing fails, logging errors and moving to the next frame. I also added a systemd service so the Pi would auto-start the detection script on boot with automatic restarts, meaning if the Pi lost power or the script crashed, it would restart automatically.
🎃 Halloween Costume Detector - Service Setup
==============================================

📋 Copying service file...
🔄 Reloading systemd...
✅ Enabling service...

✅ Setup complete!

📝 Useful commands:
   Start:   sudo systemctl start costume-detector
   Stop:    sudo systemctl stop costume-detector
   Status:  sudo systemctl status costume-detector
   Logs:    tail -f ~/costume-detector.log
   Errors:  tail -f ~/costume-detector-error.log

🎃 Ready for Halloween! The service will auto-start on boot and restart if it crashes.
Edge cases
As the project came together, a few interesting edge cases came up:
-
Multiple people: Once I got the basic pipeline working, I realized kids often trick-or-treat in groups or with their parents, so I had to adjust YOLO to detect multiple people and process each separately (
backend/src/costume_detector.py:27). The detection function collects all person detections from YOLO in a single frame, filtering by a confidence threshold of 0.7, and stores each person's bounding box coordinates. This way, each unique costume gets its own row in the database with individual classifications and confidence scores.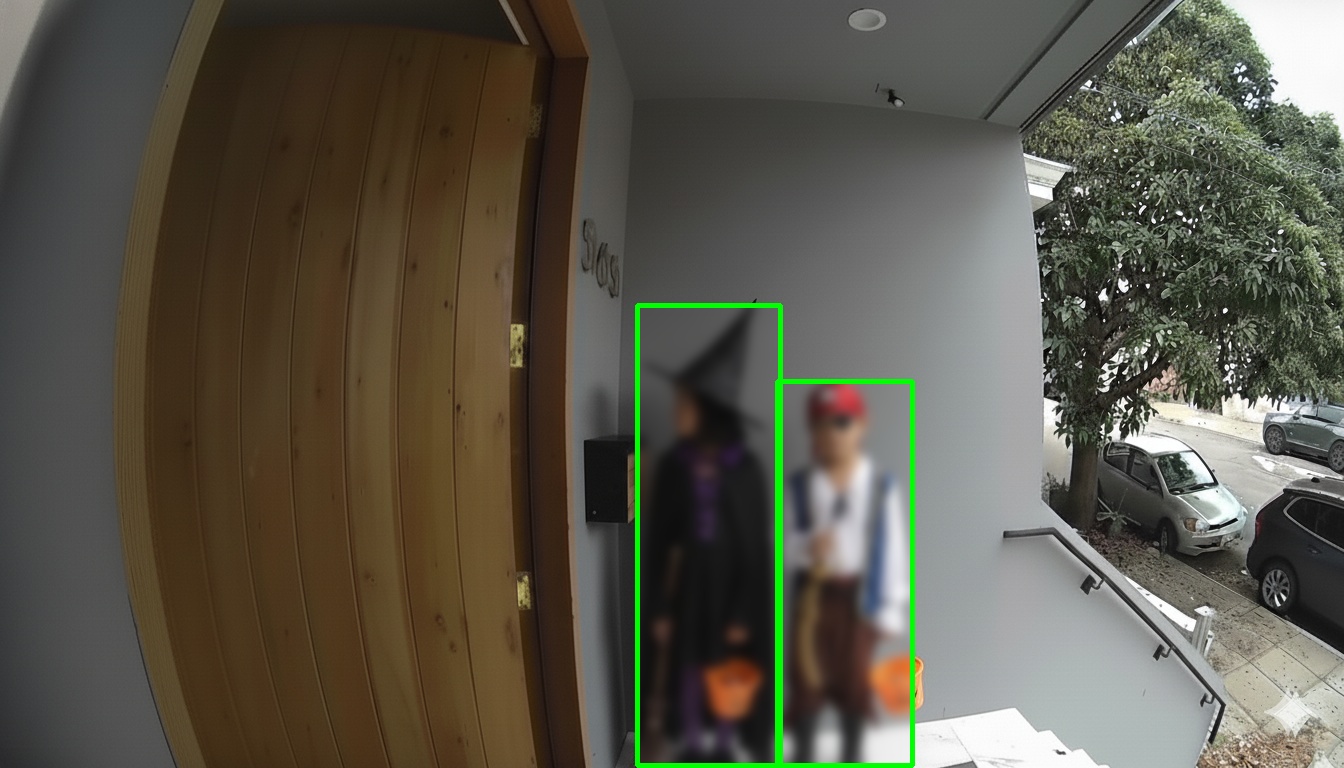
-
Non-humanlike costumes: One of the images I generated for testing had a giant blow up dinosaur, and when it wasn't correctly detected, I realized YOLO was classifying it as a car. To solve for this (and other potential non-humanlike costumes), I implemented a dual-pass detection system (
backend/src/costume_detector.py:23). The first pass detects standard people (class 0), while the second pass detects potential inflatable costumes using classes 2, 14, 16, and 17 (car, bird, dog, cat). If YOLO detects something as a car or animal, I send it to Baseten for costume classification. If Baseten confirms it's actually a costume (not a real car), it gets saved to the database. Otherwise, it gets discarded.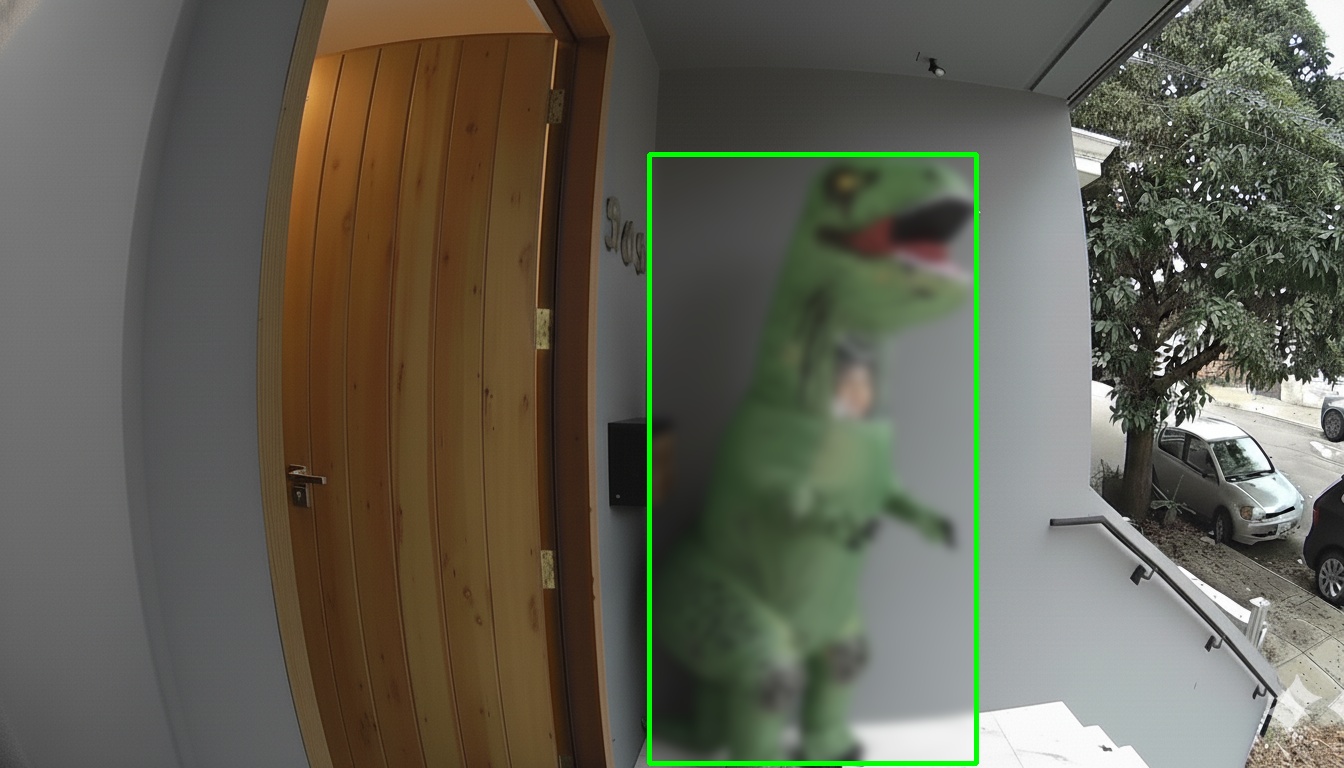
-
Region of interest: I found that YOLO was detecting people who were walking by on the street. I solved this by constraining the YOLO region of interest to my front doorstep (roughly 70% of the frame width) (
backend/scripts/main.py:85). The system defines normalized coordinates where the detection area stops at 70% across the frame width, effectively excluding the street. A bounding box is only considered valid if its center point falls within this region of interest, calculated by normalizing the center coordinates against the frame dimensions.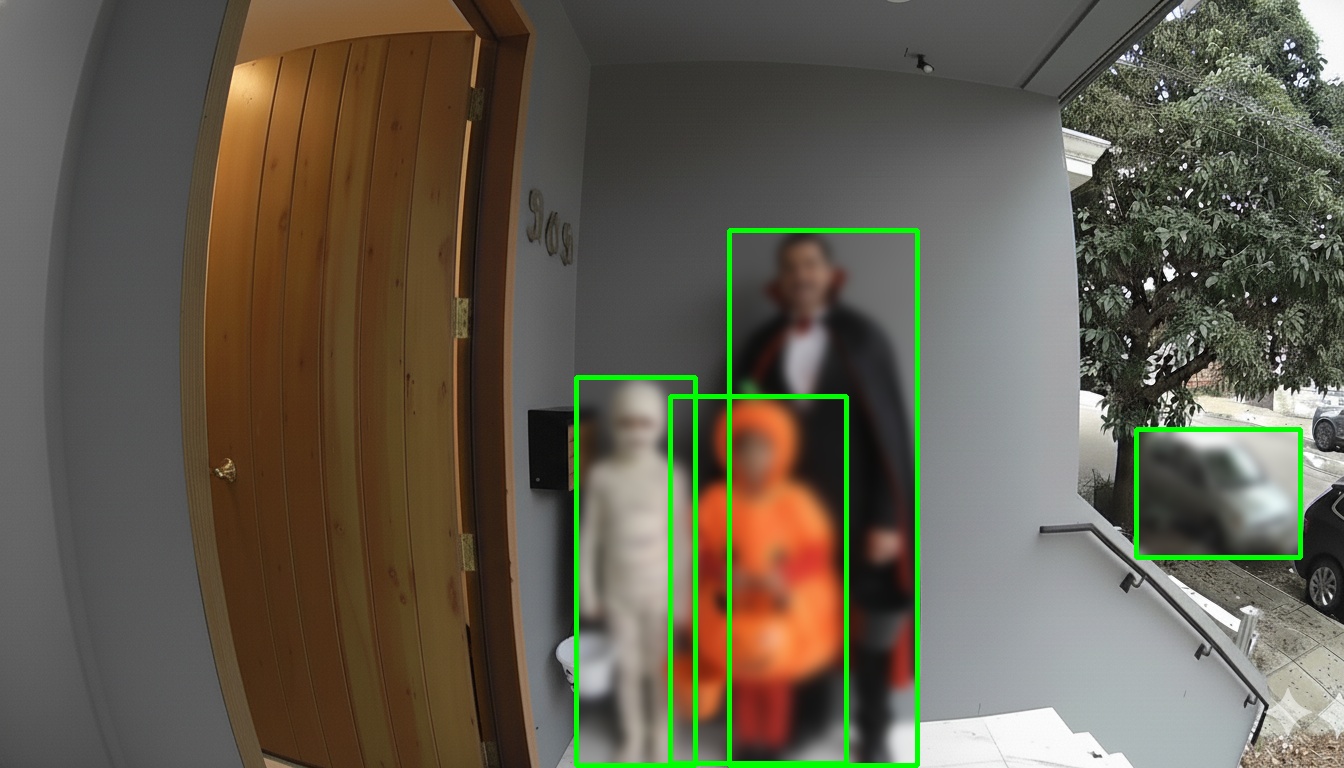
-
Cooldown period: My initial implementation of YOLO ran at roughly 1 frame per second, which is great, but resulted in multiple captures of the same person or group of trick-or-treaters. To solve for this, I implemented a 30-second cooldown and a requirement that the person be detected in at least 2 consecutive frames (
backend/scripts/main.py:82). The system increments a consecutive detection counter, and only triggers a capture once it reaches 2 frames. If a kid walks up and stays for at least 2 seconds, they get captured, then there's a 30-second cooldown before the next capture.
Learnings
-
The basics will trip you up: I'd say this project was fairly complex (for me), yet the hardest part was figuring out how to insert a microSD card into a USB reader and finding my doorbell's IP address on the local network. Hardware has a way of humbling you with the fundamentals.
-
Edge cases are where the real engineering happens: The initial "happy path" implementation was not that hard. The bulk of the work was figuring out how to handle realistic conditions (such as large groups, non-humanlike costumes, people walking on the street, & lingering trick-or-treaters) and making sure the system could run unsupervised for four hours without crashing. Building something that works in a demo is easy, but building something that works in production, even for one evening, requires obsessive attention to edge cases.
-
Building something that operates in the physical world is fun: Most of my projects live entirely on screens, so it was refreshing to build something that operates in the physical world. The feedback loop is visceral: something clicks, lights up, moves, or in this case, recognizes someone at your door. It's incredibly rewarding.
-
The real world is unpredictable: After building the system, testing it thoroughly, and obsessing over every edge case, I sat back on Halloween night ready to see dozens of costumes stream in. In reality, I got one trick-or-treater (in addition to the mailman). That was probably the biggest lesson of this entire experience: you can build a system perfectly, and yet sometimes the outcome surprises you for a reason you never considered. Next year, I'll have to do a better job of marketing.
Closing
Now that Halloween has passed, I'll need to find another use for this Raspberry Pi. If you have any ideas or suggestions for how to extend this project, hit me up. The code is fully open-source and available on GitHub.